Ubuntu装机
Ubuntu装机
Ubuntu 22.04 LTS 装系统记录,以留后用
安装系统
官方指引
Install Ubuntu desktop | Ubuntu
主要步骤
下载镜像
下载网址:
Enterprise Open Source and Linux | Ubuntu
制作USB启动盘
官方举例工具balenaEtcher ,工具网址:
balenaEtcher - Flash OS images to SD cards & USB drives
安装
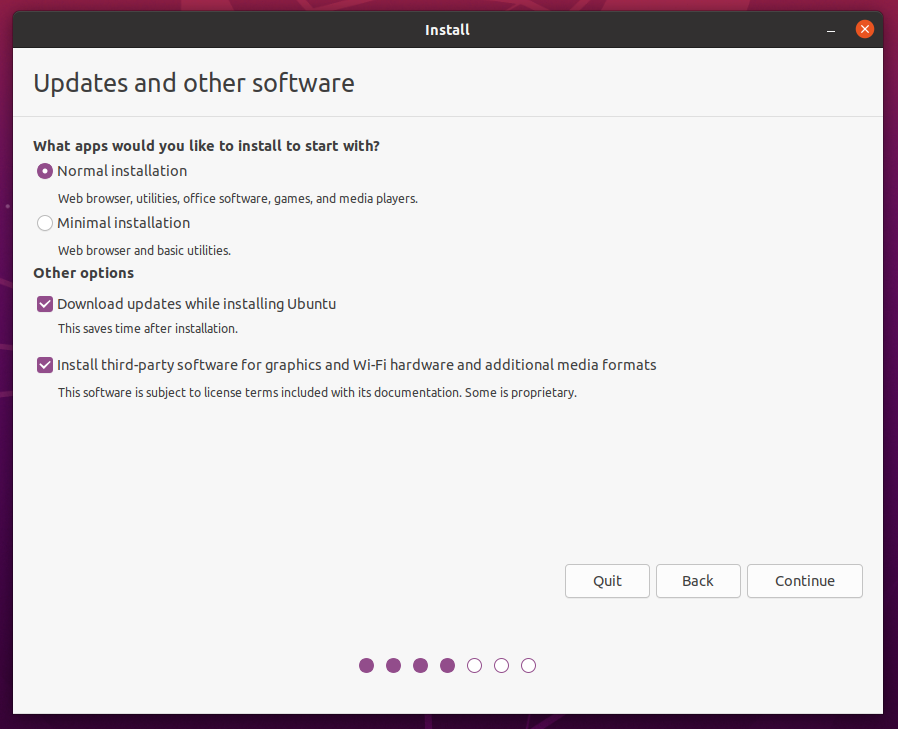
安装期间可选中文,有:
- 安装额外软件选项。(为更快安装,选普通安装,其他选项均不勾,可后期安装)
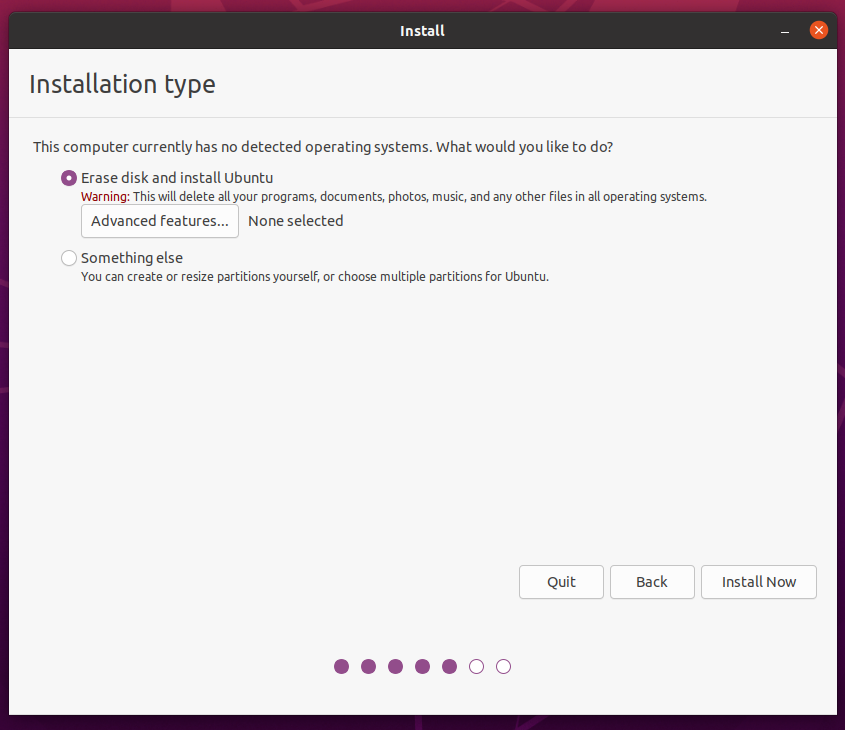
- 硬盘选项
- 后略…
安装后
换软件源
1 简单方法(GUI)
在Settings里的最后一栏About,最后一栏Software Updates,里面有个Download from,从这里找到中国,然后直接自动测试连接最快的服务器就可以了
2 命令行方式
通用方式
lsb_release -a
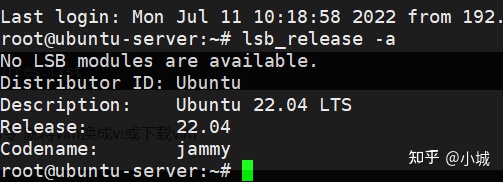
release就是该ubuntu的版本号
codename就是该版本的代号
- 备份系统源
1 | cd /etc/apt |
- 开始修改sources文件
有安装vim用户:
sudo vim sources.list
无安装vim用户:
sudo gedit sources.list
- a-(以阿里云为例)写入阿里云的源(版本:Ubuntu 22.04)
1 | deb http://mirrors.aliyun.com/ubuntu/ jammy main restricted universe multiverse |
- b-(以清华为例)写入清华的源(版本:Ubuntu 22.04)
1 | # 默认注释了源码镜像以提高 apt update 速度,如有需要可自行取消注释 |
- c-各源的版本问题
以上各源中,jammy替换为其他版本代号,就是其他版本的源。
3 命令替换
执行如下命令自动替换(清华)
1 | sudo sed -i "s@http://.*archive.ubuntu.com@https://mirrors.tuna.tsinghua.edu.cn@g" /etc/apt/sources.list |
4 可查看源官方公告
安装更新
sudo apt update
sudo apt upgrade
固件升级
要显示 fwupd 检测到的所有设备:
1 | fwupdmgr get-devices |
注意: 列表中的部分设备可能不能使用该工具更新,例如 Intel 核芯显卡,可以替代地提供的供应商解决方案。
要从 Linux Vendor firmware Service (LVFS) 下载最新的元数据:
1 | fwupdmgr refresh |
要列出系统上任何设备可用的更新:
1 | fwupdmgr get-updates |
要安装更新:
1 | fwupdmgr update |
注意:
- 可以实时应用的更新将立即完成。
- 在启动时运行的更新将为下一次重新启动做好准备。
- 可能需要使用 root 用户执行特定设备的更新。
python 换源
1 | pip3 install -i https://mirrors.aliyun.com/pypi/simple/ -U pip |
其他镜像源:
清华:https://pypi.tuna.tsinghua.edu.cn/simple
阿里云:http://mirrors.aliyun.com/pypi/simple/
中国科技大学 https://pypi.mirrors.ustc.edu.cn/simple/
华中理工大学:http://pypi.hustunique.com/
山东理工大学:http://pypi.sdutlinux.org/
豆瓣:http://pypi.douban.com/simple/
设置合盖不休眠
解决方法:修改Login Manager配置文件。
打开终端,编辑文档:
1 | sudo vim /etc/systemd/logind.conf |
找到其中一行:
# HandleLidSwitch=suspend
将其改为:HandleLidSwitch=ignore
注意前面的 # 也要去掉
然后重启服务:
1 | sudo restart systemd-logind |
或者
1 | service systemd-logind restart |
或者
1 | sudo shutdown -r now |
必要软件安装
安装软件方法
- *.deb包
sudo dpkg -i *.deb
即安装
- *.tar.gz(见下文,以FreeFileSync为例)
Visual Studio Code
可官网下载安装deb包;也可直接商店下载。
Git
安装
1 | sudo apt install git |
确认安装并检查已安装的 Git 构建版本:
1 | git --version |
配置
- 创建用户
分别输入用户名和邮箱
1 | git config --global user.name "Albert_8700" |
- 创建SSH Key
在用户主目录下,看看有没有.ssh目录,
如果有,
再看看这个目录下有没有id_rsa和id_rsa.pub这两个文件,
如果已经有了,可直接跳到下一步。
如果没有,打开Shell(Windows下打开Git Bash),创建SSH Key:
1 | ssh-keygen -t rsa -C albertlily@163.com |
可以在用户主目录里找到.ssh目录,里面有id_rsa和id_rsa.pub两个文件,这两个就是SSH Key的秘钥对,
id_rsa是私钥,不能泄露出去,
id_rsa.pub是公钥,可以放心地告诉任何人。
SSH
安装所需包
1 | sudo apt install openssh-server |
检查服务器状态(输入 q 退出该页面)
1 | service ssh status |
你还可以使用 systemctl 命令:
1 | sudo systemctl status ssh |
如果你的结果中 SSH 服务没有运行,使用这个命令运行它:
1 | sudo systemctl enable --now ssh |
允许 SSH 通过防火墙
1 | sudo ufw allow ssh |
Docker
详见docker官网
Install Docker Engine on Ubuntu | Docker Documentation
Uninstall old versions
Older versions of Docker went by the names of docker, docker.io, or docker-engine. Uninstall any such older versions before attempting to install a new version:
1 | sudo apt-get remove docker docker-engine docker.io containerd runc |
It’s OK if apt-get reports that none of these packages are installed.
Images, containers, volumes, and networks stored in /var/lib/docker/ aren’t automatically removed when you uninstall Docker. If you want to start with a clean installation, and prefer to clean up any existing data, refer to the uninstall Docker Engine section.
Installation methods
You can install Docker Engine in different ways, depending on your needs:
Docker Engine comes bundled with Docker Desktop for Linux. This is the easiest and quickest way to get started.
You can also set up and install Docker Engine from Docker’s apt repository.
Install it manually and manage upgrades manually.
Using a convenience scripts. Only recommended for testing and development environments.
- Install using the repository
Before you install Docker Engine for the first time on a new host machine, you need to set up the Docker repository. Afterward, you can install and update Docker from the repository.
- Set up the repository
Update the apt package index and install packages to allow apt to use a repository over HTTPS:
1 | sudo apt-get update |
- Add Docker’s official GPG key:
1 | sudo mkdir -p /etc/apt/keyrings |
- Use the following command to set up the repository:
1 | echo \ |
Install Docker Engine
- Update the apt package index:
1 | sudo apt-get update |
Receiving a GPG error when running apt-get update?
Your default umask may be incorrectly configured, preventing detection of the repository public key file. Try granting read permission for the Docker public key file before updating the package index:
1 | sudo chmod a+r /etc/apt/keyrings/docker.gpg |
- Install Docker Engine, containerd, and Docker Compose.
- Latest
- Specific version
To install the latest version, run:
1 | sudo apt-get install docker-ce docker-ce-cli containerd.io docker-compose-plugin |
- Verify that the Docker Engine installation is successful by running the hello-world image:
1 | sudo docker run hello-world |
This command downloads a test image and runs it in a container. When the container runs, it prints a confirmation message and exits.
You have now successfully installed and started Docker Engine. The docker user group exists but contains no users, which is why you’re required to use sudo to run Docker commands. Continue to Linux post-install to allow non-privileged users to run Docker commands and for other optional configuration steps.
Upgrade Docker Engine
To upgrade Docker Engine, follow the installation instructions, choosing the new version you want to install.
Install from a package
If you can’t use Docker’s apt repository to install Docker Engine, you can download the deb file for your release and install it manually. You need to download a new file each time you want to upgrade Docker Engine.
Go to https://download.docker.com/linux/ubuntu/dists/.
Select your Ubuntu version in the list.
Go to pool/stable/ and select the applicable architecture (amd64, armhf, arm64, or s390x).
Download the following deb files for the Docker Engine, CLI, containerd, and Docker Compose packages:
1 | containerd.io_<version>_<arch>.deb |
Install the .deb packages. Update the paths in the following example to where you downloaded the Docker packages.
1 | sudo dpkg -i ./containerd.io_<version>_<arch>.deb \ |
The Docker daemon starts automatically.
Verify that the Docker Engine installation is successful by running the hello-world image:
1 | sudo docker run hello-world |
This command downloads a test image and runs it in a container. When the container runs, it prints a confirmation message and exits.
You have now successfully installed and started Docker Engine. The docker user group exists but contains no users, which is why you’re required to use sudo to run Docker commands. Continue to Linux post-install to allow non-privileged users to run Docker commands and for other optional configuration steps.
向日葵
有桌面版和命令行版两个选择。
其中会出现依赖问题,通用方式解决。
命令行版安装步骤 (命令行版不能进行桌面控制,建议安装桌面版):
下载
wget https://dl-cdn.oray.com/sunlogin/linux/sunloginclientshell-10.1.1.28779-amd64.deb安装
sudo dpkg -i 文件名.deb启动
/usr/local/sunlogin/bin/sunloginclient
卸载 方法:
1 | sudo dpkg -r sunloginclient |
Freefilesync
下载(也可以在浏览器下载):
1 | wget https://freefilesync.org/download/FreeFileSync_11.0_Linux.tar.gz |
解压:
1 | tar xvf FreeFileSync_11.0_Linux.tar.gz |
解压之后进入FreeFileSync文件夹,就可以双击运行程序了。
我们可以创建一个启动器,这样我们可以从桌面运行这个程序了,修改FreeFileSync.desktop文件中的Exec和Icon的路径,选择你解压FreeFileSync的位置:
1 | cd /home/bob/FreeFileSync/ |
并将FreeFileSync.desktop文件拷贝到/usr/share/application目录中:
1 | sudo cp -p /home/bob/FreeFileSync/FreeFileSync.desktop /usr/share/applications/ |
Done
多版本python共存问题
以下是18.04版本装机时的参考
1 | > Ubuntu18.04兼容Python2.7、Python3.6、Python3.8以及pip、pip2、pip3问题 |